Create and edit cost centres/energy use/machines
The procedure is the same for all allocation objects and is explained below using the cost centre as an example.
- In the tree view, navigate to the parent object. The top level is the project.
- Use the
 button to create a new cost centre.
 - Please enter a name and a number.
- Save the new cost centre.
Properties
Name/Designation/Title | A meaningful text entry. The designation is used for identification and search purposes and can be changed at any time. |
Number | Text, max. 15 characters – Any string of characters for identification purposes. |
| Display of a simple pie chart for a selected measured variable. The measured variable can be selected using the drop-down menu above the chart. All measured variables that are actually present in the assignments are listed. Apart from that, the chart offers all the functions of a pie chart. The only features missing are those relating to visual customisation. However, using the “Save As” function, it can be saved to a folder, allowing further customisations to be made. |
| Display and editing area for assigning the proportions of measured variables.
|
| Display of the calculated shares of the measured variables. |
Selecting and assigning tags enables you to filter and sort lists. | |
List – Displays the links associated with visual energy objects. | |
|
|

 Navigation to the parent object
 Recalculate data. This function can be useful if allocations or proportions have been changed and it is not possible to wait until the next calculation interval.
 Display assignments in tile view.
 Display assignments in list view.


 The current object is selected as a favourite.
Add a measured variable or sub-object
- Select the cost centre.
- On the properties page, use the
 button to select the content.
 - The button can be used to add either a measured variable or a sub-object. The process for creating a sub-object is the same as that described above. Here, then, is a description of how to add a measured variable for a metering point.
- The selection dialog can be used to select any “Consumption” type metering point or one of its measured variables.
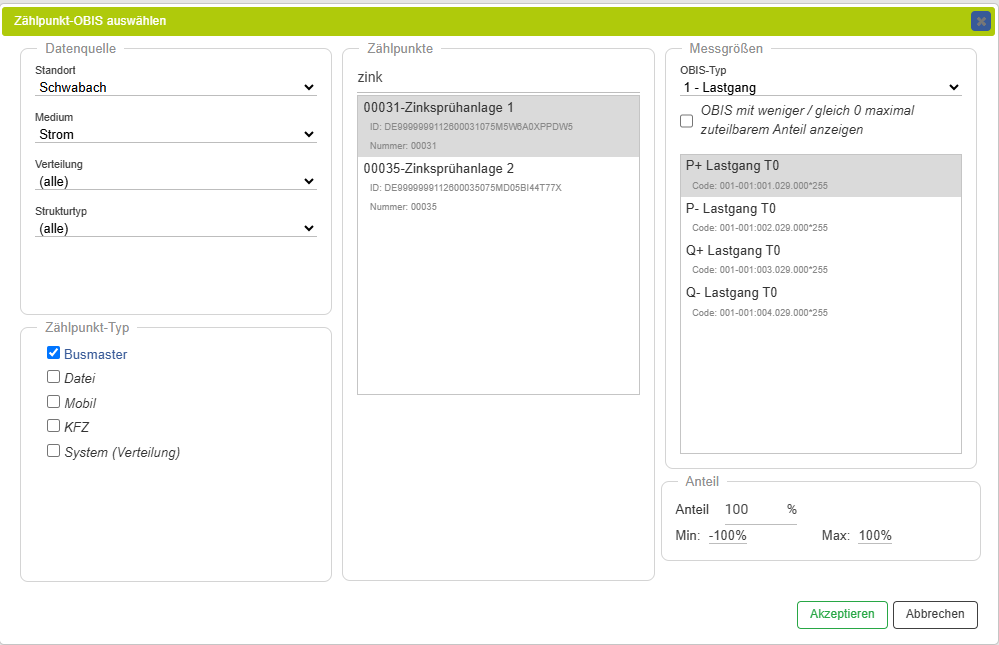
The maximum possible share is suggested in the selection dialog box. This figure can be reduced further and will be added to the cost centre when you click “Accept”. The value can be changed at any time.